How to Safely Tie a Horse
If you are new to horses, learning how to safely tie a horse is one of those foundational skills that nobody makes a big deal about until something goes wrong. And something will go wrong eventually, because that is how this life works. A horse that pulls back against a solid tie, a knot that will not release under pressure, a rope tied too low or to something that gives way — these are not rare catastrophes. They happen at lesson barns, at boarding facilities, at shows, and in home paddocks every single day. Getting this right from the start matters, not because it is complicated, but because the margin for error around a thousand-pound animal is smaller than most beginners expect.
The Riding Life is reader-supported. When you buy through links on our site, we may earn an affiliate commission at no extra cost to you.
Why Tying Matters More Than It Looks
Standing tied is a trained behavior. It is not something horses do naturally. In the wild, a horse that felt trapped would leave. Full stop. What we are asking when we tie a horse is for it to trust that staying put is safe, and that trust is built slowly, over time, through consistent handling and through not putting horses in situations they are not ready for before they have the training to handle it.
At our barn, lesson horses get exposed to tying early and often. By the time a new rider is grooming them for the first time, those horses have been tied hundreds of times. They stand like furniture. But bring in a greener horse, or put an experienced horse somewhere unfamiliar, and you are starting a different conversation. The horse’s history matters, the environment matters, and your setup matters. All three have to be right.
If you are newer to barn life and still getting your footing on what horse care actually involves day to day, the horse care basics for beginners overview is worth a read before you go deeper on any single skill.
The Right Location and What You Are Tying To
This is where most mistakes happen, and they happen because people underestimate how much force a horse can generate when it decides to pull back. A frightened horse in full panic can exert hundreds of pounds of pressure on a lead rope. Whatever you tie to needs to be able to hold that, or it needs to be something designed to break away safely before the horse gets hurt.
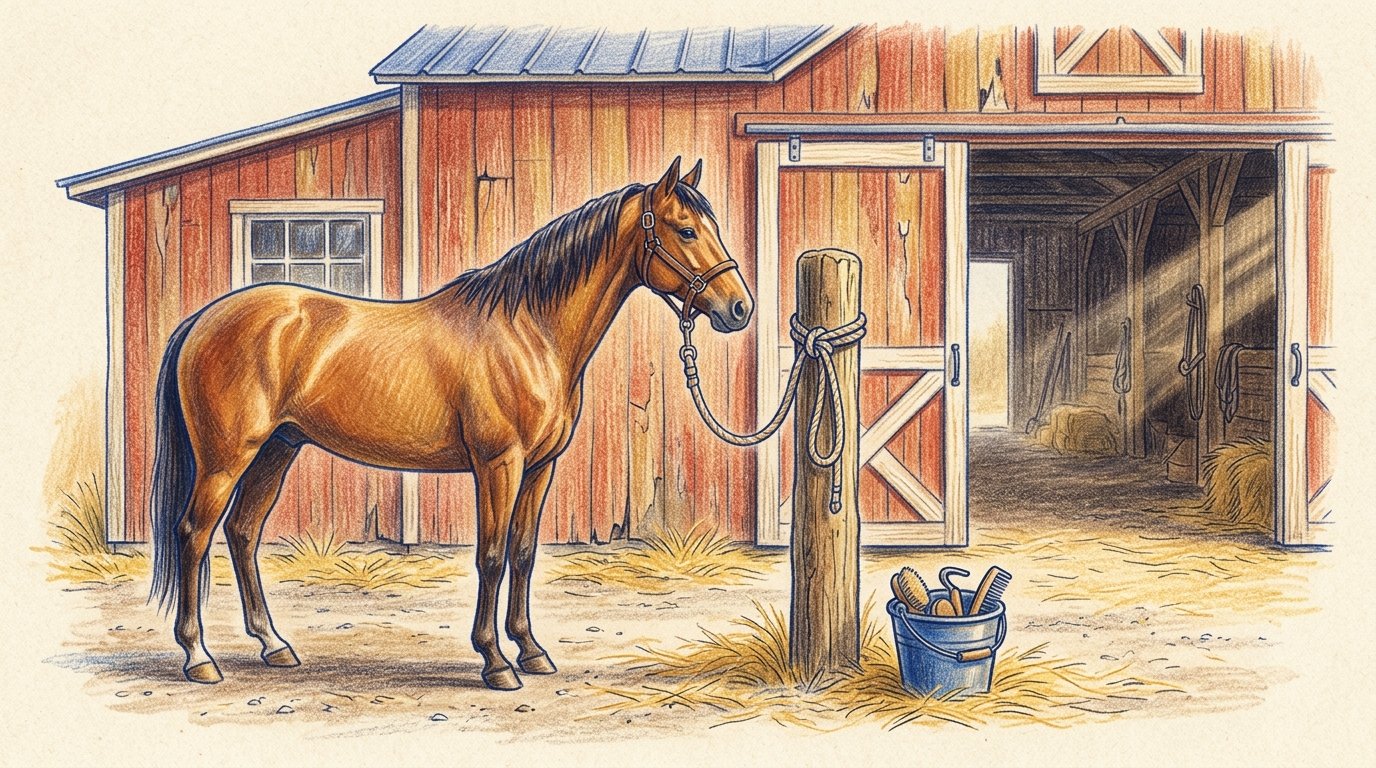
The rules for a safe tie location are straightforward. Tie to something solid and fixed — a heavy post, a properly anchored hitching rail, a barn wall with a tie ring bolted through to a stud. Never tie to a fence panel that can pull free, a gate that can swing open, a trailer door that is not latched, or a piece of equipment that can tip. If it can move, do not use it.
Tie rings bolted directly into wood or concrete are the standard setup at most barns for good reason. You can also use a trailer with proper tie rings, a hitching post sunk deep in the ground, or cross-ties inside an aisle that are anchored correctly on both ends. What you do not want is anything that wobbles, anything that is anchored with a single screw, or anything the horse can drag if it decides to leave.
Height matters too. Tie at or above the horse’s withers. Many sources say tie at eye level. Either works. What you absolutely do not want is a rope tied low enough that the horse can get a leg over it. Low ties are how horses get tangled and panic, and a panicking horse is dangerous to itself and to anyone nearby.
How to Safely Tie a Horse Using a Quick Release Knot
The quick release knot — sometimes called a slippery hitch — is the only knot you should be using to tie a horse to a solid object. Full stop. It holds under normal standing pressure, but it releases with a single pull on the free end in an emergency. That matters. If a horse goes down, if it gets a leg over the rope, if something spooks it badly and it pulls back hard, you need to be able to get that rope free fast. A standard square knot or a double half hitch tied tight will not come free under load. The quick release knot will.
Here is how it works. Thread the lead rope through your tie ring. Take the working end of the rope — the end connected to the horse’s halter — and hold it taut. With the free end, form a loop, pass the loop through itself, and tighten it by pulling the standing part. To release, pull the free end. That is the whole knot. Practice it slow until your hands know it, then practice it a little faster, because you will not always be releasing it under calm conditions.
One important addition: thread the free tail through the loop so the horse cannot pull it free itself. Horses figure things out. Some of them learn to grab that free end and release their own tie, which is clever but not a habit you want to encourage. Tucking the tail through the loop prevents it without compromising your ability to release it quickly.
Rope length also matters. Leave enough slack that the horse can hold its head naturally and move it up and down, but not so much that it can turn all the way around or get the rope under a front leg. Roughly 12 to 18 inches of slack between the knot and the horse’s head is a reasonable target. Adjust based on the individual horse and the situation.
Cross Ties and When to Use Them
Cross ties are two ropes attached to opposite walls of an aisle, clipped to rings on either side of the halter. They keep the horse centered in the aisle and make grooming and tacking up easier because the horse has less room to swing its hindquarters around. Most lesson barns use them as the primary tie setup in the grooming area, and for good reason — they work well for horses that are trained to them.
The same basic rules apply. Cross ties need to be anchored to something solid on both ends. The clips that connect to the halter should be breakaway — either a fuse clip, a safety clip, or a section of bailing twine between the tie and the clip — so that if the horse truly panics and pulls back hard, something breaks before the horse does. A horse that flips over in cross ties because nothing gave way is a horse that may be hurt badly and may never cross tie quietly again.
Do not put a green horse or a horse you do not know well into cross ties without supervision. Some horses have had bad experiences with them and will tell you immediately. Watch for a horse that sets back against the ties the moment it feels pressure, pins its ears, or starts shifting its weight backward. That horse needs more ground training before cross ties are appropriate.
For more context on common horse health situations that can arise when things go sideways in the barn — including what happens when a horse gets cast or injures itself — common horse health issues covers the ones that matter most to barn families.
Teaching a Horse to Stand Tied
If you own or lease a horse that does not stand tied quietly, that is a training problem, not a tying problem. No setup is safe-proof against a horse that has not been taught to accept pressure on the halter and stand. The fix is not a stronger tie point. The fix is ground work.
The basic process is desensitization and pressure-and-release work. You teach the horse that pulling against the rope produces pressure that goes away when it stops pulling. You start with light rope pressure by hand, reward the horse for stepping toward the pressure instead of away from it, and build from there. Many horses that pull back have learned to do it because they succeeded once — the rope broke, the tie ring pulled free, or someone untied them the moment they started pulling. That horse learned that pulling gets it free. Retraining that takes time and consistency, and if you are not experienced with it, a qualified trainer is worth the investment.
If you are in the early stages of your horse journey and still sorting out leasing versus ownership and what each of those situations actually looks like day to day, leasing a horse versus buying lays out the real differences in a way that does not sugarcoat the commitment involved.
Frequently Asked Questions
How long is it safe to leave a horse tied?
This depends on the horse, the conditions, and what it has access to. For grooming and tacking, you are usually talking 20 to 45 minutes, which is fine for a trained horse in a safe setup. Leaving a horse tied for hours without water, without shade in summer, or without the ability to move at all is a welfare issue. If you need to tie a horse for a longer stretch — at a show or trail head — make sure it has water, a hay net to work on, and you check on it regularly.
Can you tie a horse by the bridle?
No. Never tie a horse by the bridle. The bit, the headstall, and the reins are not designed to hold a horse if it pulls back. The bit can injure the horse’s mouth severely under that kind of pressure, and the leather or biothane can break in ways that leave you with a loose horse and a damaged headstall. Always tie by the halter. If you need to tie a horse while it is bridled, put a halter over the bridle or use a halter-bridle combination and tie to the halter rings only.
What is a blocker tie ring and should I use one?
A blocker tie ring is a device that allows the rope to slip through when the horse pulls back hard enough, releasing pressure before the horse panics or injures itself. It is not a substitute for training, but it is a useful tool for horses that are still learning to stand tied or that have a history of pulling back. The rope stays in place under normal pressure but feeds through if the horse sets back hard. Many barns that work with young or green horses keep a few of these on hand. They are worth considering if you are working with a horse that is not fully trained to tie.
What should I do if a horse pulls back and gets stuck?
Stay calm and stay out of the kick zone. If the rope is on a quick release knot, pull the free end to release it. If the horse is tangled in cross ties, release both sides if you can do so safely. Do not try to hold the horse or restrain it further — a panicking horse needs the pressure removed, not added. Once it is free, give it a moment to settle before you approach. Check for rope burns around the halter and face, check the legs, and assess before doing anything else. If you are not sure the horse is okay, call your vet.
The Bottom Line on Tying Safely
Learning how to safely tie a horse is the kind of skill that feels basic until you watch it go wrong, and then it feels like the most important thing you never paid enough attention to. The quick release knot, a solid tie point at the right height, appropriate rope length, a horse that has been trained to accept pressure — these are not complicated pieces. They just all have to be in place at the same time.
The barn teaches you this stuff if you pay attention. Watch what the experienced handlers do. Ask questions when you do not know something. Nobody who has spent real time around horses thinks a tying question is a dumb question, because every one of us has seen what happens when it goes wrong.
If you are building your barn knowledge from the ground up, grab our free printable checklist to keep the basics handy, and explore the shop for gear and resources that actually hold up to barn life. We only recommend what we have seen work.