How to Improve Two Point Position
If you have spent any time watching riders at a lesson barn, you already know that learning how to improve two point position is one of those things that looks simple from the rail and feels impossible in the saddle. The two point is the foundation of jumping, cross-country work, and half-seat flat work across English disciplines, and the riders who have it dialed in make it look effortless. They do not. It takes deliberate, repetitive work, usually months of it, and a fair amount of honest feedback about what your body is actually doing versus what you think it is doing.
The Riding Life is reader-supported. When you buy through links on our site, we may earn an affiliate commission at no extra cost to you.
What Two Point Position Actually Is and Why It Matters
Two point means you have lifted your seat out of the saddle and your weight is distributed into your two legs, hence the name. Your heels are down, your knees are soft and act as a hinge, your hips are pushed back and down toward the saddle without sitting in it, and your upper body is inclined slightly forward following the horse’s motion. Your hands are soft and following. That is the whole picture.
Why it matters: a rider who cannot hold a stable two point cannot jump safely, cannot gallop across a field without bouncing around on the horse’s back, and cannot ride a course with any kind of consistency. Two point is also the single best diagnostic tool a trainer has for identifying weaknesses in a rider’s base. If your heels pop up, your core is weak. If your upper body collapses forward, your hip angle is wrong. If you grip with your knee and your lower leg swings back, your whole base of support is off. The position tells the truth about everything underneath it.
From the parent chair, I have watched riders fight two point for a long time before it clicked. The ones who get there fastest are not necessarily the most talented athletes. They are the ones who practice it deliberately, not just when their trainer calls for it.
The Most Common Two Point Mistakes and How to Fix Them
Let’s go through what actually goes wrong, because fixing mistakes requires knowing what they are.
Heels coming up. This is almost always a core and hip stability problem, not a foot problem. When your center of gravity is not anchored through your core and down through a long leg, your heel comes up as a counterbalance. The fix is not to think about your heel. The fix is to think about pushing your heel down by lengthening your whole leg, starting from your hip. Dropping your weight into a long stirrup is different from jamming your toe up.
Chair seat in two point. Some riders sit down in two point, which means they bring their hips forward instead of back. The result is a chair seat with a lifted seat, which is the worst of both positions. Think of pushing your hips back toward the cantle while keeping your upper body following the horse forward. Those two directions working together create the correct hip angle.
Upper body collapsing over the neck. Usually caused by the rider trying to get out of the saddle by pitching forward rather than driving weight into the heel. This is especially common in beginner jumpers who are nervous and want to be out of the horse’s way before the jump happens. It does the opposite of what they intend. Stay back through the approach.
Gripping with the knee. When you grip with your knee as your primary anchor point, your lower leg swings back and up and your heel follows. Your knee should be a soft hinge. Your lower leg should hang under you with light contact, not clamp.
For a broader look at position fundamentals beyond the two point, this piece on how to improve your riding position covers the whole picture from the flat on up.
How to Improve Two Point Position with Specific Drills
Drills are where two point actually gets built. Talking about it does not build the muscle memory. Time in the position does.
No-stirrup work. This sounds counterintuitive because two point requires stirrups, but no-stirrup work at the walk and sitting trot builds the core and hip stability that two point depends on. It is not fun. It is effective. A few minutes of no-stirrup work at the beginning or end of every flat ride makes a measurable difference over time.
Two point at the walk, then trot, then canter, in that order. Riders often jump to holding two point at the canter before they have genuinely stabilized it at the trot. Walk first. Hold it until it is boring. Then trot. Time yourself. Hold two point for thirty seconds without gripping, without your heels coming up, without your upper body diving. Then sixty seconds. Build the clock before you add speed.
Posting trot into two point transitions. Posting trot, then freeze in two point for several strides, then posting again. This teaches the rider to find the position independently of momentum and rhythm. It is a good exercise to understand the mechanics of posting trot before layering this drill on top of it.
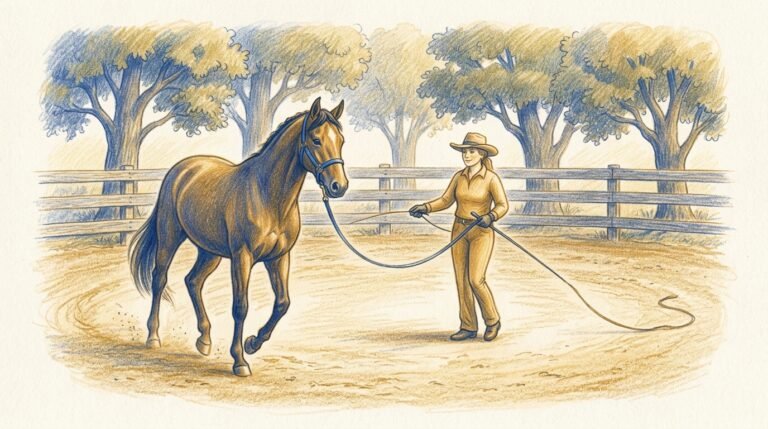
Two point with eyes closed at the walk. Have someone lead the horse or work on a lunge line. Closing your eyes removes visual compensation and forces you to feel your balance through your body. Most riders discover immediately that they were gripping somewhere they did not realize.
Cavaletti and ground poles. Working over poles in two point teaches the rider to maintain the position through a moment of increased energy and slight change in the horse’s frame. It bridges the gap between flat two point work and actual jumping.
Riders who are also working on sitting the canter will find these positional concepts overlap in interesting ways. The guide on how to sit the canter is worth reading alongside two point work because the core engagement required is essentially the same.
Gear That Actually Helps Your Two Point
Two point is a body problem, not a gear problem. That said, the wrong gear genuinely makes it harder.
Stirrup length matters more than most beginners realize. For two point work, stirrups are typically shortened one to two holes from your flat length. If your stirrups are too long, you cannot effectively push weight into your heel because your leg is already fully extended. If they are too short, your hip angle is too closed and you end up perching.
Half chaps make a real difference in leg stability. When your lower leg is slipping and sliding against the saddle, maintaining a quiet position is harder than it needs to be. A good pair of half chaps gives your leg grip without gripping. If you are still figuring out that purchase, this breakdown of how to choose half chaps covers what to look for.
Stirrup irons with a grip pad or wider tread also help, because they keep your foot from sliding through the iron while you are working in a half seat. The Dover Saddlery stirrup iron selection is worth browsing if you are in the market; they carry options across a wide price range and the quality is consistent.
For riders who want additional reading on training methodology and two point development from a technical standpoint, Practical Horseman publishes regular position breakdowns with detailed photography that is genuinely useful for visual learners.
How Long Does It Take to Build a Solid Two Point
Honest answer: longer than you think, and it is never fully finished. A rider who has been working consistently for a year can usually hold a passable two point at the trot. Holding it comfortably through a canter course with a quiet leg and soft hands typically takes longer, and for most riders that is measured in years of consistent riding, not months.
Progress also is not linear. A rider who had a solid two point last month can have it fall apart when they move to a new horse, when they grow three inches over the summer, when they get nervous about a bigger jump, or when they take two weeks off. This is normal. The work is always to come back to the fundamentals: heel down, hinge in the knee, hip pushed back, upper body following.
From the parent chair, the biggest thing I have noticed is that the riders who improve fastest are the ones who work on it outside of their lessons. Not necessarily riding, though more riding is always better. Watching video of themselves, doing balance exercises off the horse, paying attention to what their trainer says for a full week instead of just nodding and forgetting. Two point rewards the riders who take it seriously between lessons, not just during them.
Frequently Asked Questions
How long should I hold two point when practicing?
Start with thirty-second intervals at the trot and build from there. The goal over time is to hold a quiet, stable two point for several minutes without your position deteriorating. Time yourself honestly. When your heel starts coming up or you start gripping, that is the end of the interval, not something to push through with bad form.
Can I work on two point without jumping?
Absolutely, and you probably should before you add jumps into the equation. Two point is a flat work skill that happens to be essential for jumping. Building it on the flat, over poles, and over cavaletti before adding actual fences gives you a much more stable foundation than trying to learn the position over jumps while also thinking about the jump itself.
Why does my lower leg swing back when I go into two point?
This almost always means you are pitching your upper body forward to get out of the saddle rather than pushing your hips back and down. When your upper body goes forward, your lower leg swings back to counterbalance. Work on the hip angle first. Think about folding at the hip, not leaning from the shoulder.
Does riding position off the horse help with two point?
Yes. Core strength, hip flexibility, and overall body awareness all contribute to how quickly two point improves. Exercises like planks, squats, and yoga that emphasize hip mobility and core stability translate directly into the saddle. It is not a replacement for riding, but it is a genuine supplement.
Start Building Your Two Point Today
Two point position is one of those foundational skills that every English rider needs and most riders underestimate. It is built in small increments over consistent time, not cracked in a single lesson. Work the drills. Time yourself. Watch video. Listen to your trainer and then actually practice what they said before the next lesson. The position will come, and when it does it changes everything about how you ride.
If you found this useful, grab our free printable checklist to track your two point progress drill by drill, and head over to the shop for more tools and resources built for real barn families. We keep adding to it, so check back when you are ready for the next step.