How to Organize a Tack Room
If you have spent any time around a barn, you already know that figuring out how to organize a tack room is one of those problems that never fully goes away. You solve it, something shifts, a new boarder arrives, show season starts, and suddenly the saddle pads are on the floor again and nobody can find the hoof pick. We have been through this cycle more than once, and what we have learned is that the goal is not a perfect tack room. The goal is a functional one, where you can find what you need in the dark at five in the morning without knocking three things over to get to it.
The Riding Life is reader-supported. When you buy through links on our site, we may earn an affiliate commission at no extra cost to you.
Start With a Real Assessment Before You Buy a Single Hook
The first mistake most people make when they decide to organize a tack room is heading straight to the feed store or going down a Pinterest rabbit hole before they have looked honestly at what they actually have. Pull everything out. Every saddle pad, every old tube of liniment, every broken crop you keep meaning to throw away, every boot that belongs to nobody. Get it all into the open.
Once you can see it, sort by category. Leather tack goes together: saddles, bridles, girths, breast collars. Fabric and soft goods go together: saddle pads, polo wraps, splint boots. Grooming supplies get their own pile. Medications and first aid get their own spot, and that spot should be clearly labeled and out of reach of anyone who does not know what is in there. Blankets are usually too big to store in a standard tack room and are better handled with dedicated hooks or a separate blanket bar outside the door.
Now look at what you have and what your space actually allows. A small shared tack room at a lesson barn operates completely differently from a private room attached to a home stable. Do not design for someone else’s space. Design for yours.
How to Organize a Tack Room Around the Things You Use Every Day
The core organizing principle for any working tack room is frequency of use. What you grab every single day should be closest to the door, at hand height, with nothing in the way. What you use twice a year can live on a high shelf or in a labeled bin in the back corner.
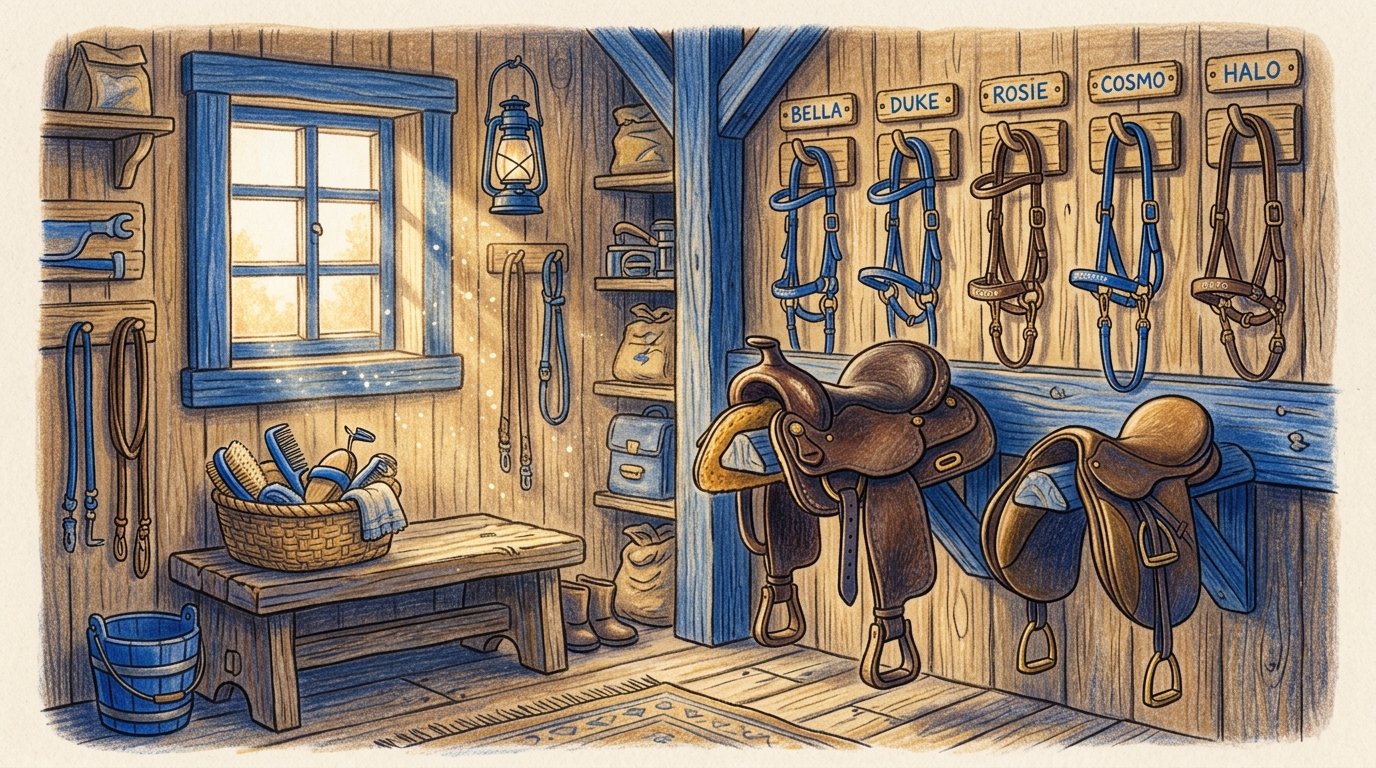
Saddle racks are non-negotiable. A saddle on the floor is a saddle getting damaged, full stop. Wall-mounted racks are the most space-efficient option for most barns. If you have multiple saddles, numbered or labeled racks help, especially in a shared space where boarders each have their own section. Bridle hooks go directly below or beside the corresponding saddle so you are not hunting across the room for the right combination. Simple cup hooks work, but deeper bridle holders protect the headpiece shape better over time.
Saddle pads deserve more thought than they usually get. A wet or sweaty saddle pad going back onto the rack is a mold and odor problem waiting to happen. A simple saddle pad rack mounted on the wall, or even a wooden dowel rod screwed between two studs, gives pads a place to dry before they get folded and stored. If your barn gets humid summers, this matters more than almost anything else in here.
Grooming supplies are the category that creates the most visual chaos in most tack rooms. A bucket or tote per horse is the cleanest system: everything that belongs to that horse lives in one container, and that container lives on a labeled shelf. When you are in a hurry before a lesson, you grab one thing. You do not rifle through a communal bin hoping the good shedding blade is still in there. We use this system and it has held up through years of early-morning barn scrambles. If you want to go one step further, a Tough-1 Grooming Tote keeps everything upright and visible without tipping over. For a full rundown on what actually belongs in a grooming kit, see our guide to the best grooming brushes for horses.
Tack Care and Storage Go Together
An organized tack room is not just about where things live. It is also about keeping the leather in good shape while it sits there. Leather left in a damp, unventilated space cracks. A tack room that holds heat and moisture all summer is actively destroying your equipment. If you can add a small dehumidifier or even just improve ventilation, do it. It is a cheaper fix than replacing a bridle.
Clean tack before it goes back on the rack. This is the habit that separates the rooms that smell like a saddlery from the rooms that smell like mildew. It does not have to be a full conditioning session every ride, but wiping the sweat off the bit and the girth before everything goes up takes two minutes and extends the life of your leather significantly. We have a full breakdown of the process in our article on how to clean and condition tack if you want the specifics.
A Leather CPR Cleaner and Conditioner kept on a small shelf near the tack hooks means it is there when you need it and there is no excuse to skip the step. Put it where the habit happens, not in a cabinet where it will be forgotten.
Labels, Zones, and the Shared Tack Room Reality
If you are in a boarding situation with multiple horses and multiple riders using the same space, the organizing challenge is different from a single-family setup. The answer is clear zones and permanent labels. Every boarder gets a defined section. Saddle racks, bridle hooks, and a shelf or bin in that section belong to that person. What spills out of that section becomes a barn-wide problem.
Labels do not have to be fancy. A label maker works. Painter’s tape and a marker works. What matters is that they are visible and they stick to the system. New boarders should be oriented to the system on day one, not left to guess where things go and develop their own habits that conflict with everyone else’s.
Small items, things like spare stirrup leathers, extra billets, a bottle of coat spray, a spare set of polo wraps, can live in a labeled plastic bin on a shelf. The bins that stack and have pull-out drawers are more useful than plain stackable boxes because you can see and access what is inside without moving everything. Hardware stores carry these. You do not need the equestrian-branded versions.
Seasonal gear, winter blankets in summer, fly sheets in January, takes up space it does not need to take up. A labeled storage bin or a garment bag hung on the outside of the tack room frees up the usable daily space. For guidance on blanket sizing and types before you decide how to store them, the horse blanket sizing guide is worth a read.
Maintaining the System When Life Gets Busy
The hardest part of any tack room organization project is not the initial setup. It is the Thursday after a show when everyone is tired and the gear comes off the trailer and lands wherever it lands. The system survives or fails in those moments.
A few habits help more than any product. First, put it away before you leave the barn. Not almost away. All the way away. Second, do a five-minute reset once a week, ideally at the same time every week, where you just return anything that drifted. Third, if something does not have a place, find it one before it becomes a permanent floor item.
If the barn hosts shows or camps, agree in advance on how shared tack room space will be handled during those weeks. Show season can completely undo an organized space if nobody has a plan for where the extra equipment goes while it is in rotation. Temporary hooks and a designated overflow area are worth setting up before the first trailer rolls in.
Frequently Asked Questions
What is the most important thing to organize first in a tack room?
Start with saddle storage. A saddle on a proper rack instead of the floor protects your most expensive piece of equipment and immediately frees up the floor space that everything else is competing for. Once saddles are on the wall, the rest of the room becomes easier to think through.
How do I keep a shared tack room organized when multiple people use it?
Assigned zones with clear labels are the only system that holds up over time. Each horse and rider gets a defined section, and everything belonging to that pair lives in that section. Without a zone system, shared tack rooms drift toward chaos no matter how motivated everyone starts out.
How often should I clean and reorganize a tack room?
A five-minute weekly reset handles most of the drift. A deeper clean and reorganization twice a year, once in the spring and once before winter, is enough for most barns. Use those sessions to pull expired medications, retire damaged gear, and reassess whether your current layout still matches how you are actually using the space.
What storage products are actually worth buying for a tack room?
Wall-mounted saddle racks, deep bridle holders that protect the headpiece, and a grooming tote per horse are the three things that make the biggest difference. Beyond that, basic labeled bins and a saddle pad drying rack cost almost nothing and solve a lot of problems. Resist the urge to buy specialty organizers before you know exactly where they will live and what they will hold.
A Tack Room Worth Walking Into
A well-organized tack room does not happen because someone bought the right bins. It happens because someone made a plan, set up a system that matched how the barn actually runs, and built the habits to maintain it. That is achievable in any space, at any budget level, at a lesson barn or a private stable or anything in between.
Start with what you have. Sort by frequency of use. Get saddles off the floor. Label everything. Reset it once a week. That is the whole system. Everything else is refinement.
If you want to take it further, grab our free printable tack room organization checklist to walk through the setup zone by zone, and explore the shop for the gear and storage tools we actually use at our barn.